How I made the look of Noodlebonks
I've had a few people ask me how I did the visuals and animations of Noodlebonks, and I'm flattered! I'm still new to game dev -- especially new to the techniques I use for visuals -- but it warms my heart to hear that people like how Noodlebonks looks so much! I won't ramble on anymore though, so let's jump into it!
The Base Animation
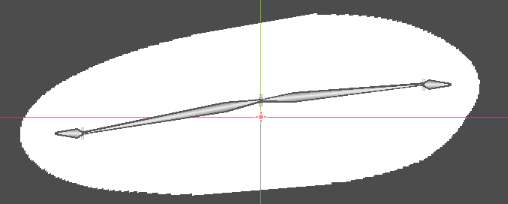
I started with a white oval-ish shape:

Then I created a simple skeleton:
(I followed this guide to learn how to use them: https://docs.godotengine.org/en/stable/tutorials/animation/2d_skeletons.html)
I used a skeleton because it allows this image to deform and flow between different animations very smoothly. Because I wanted to make the Noodlebonks look as organic as possible, having a system that flows seamlessly between different animations was essential.
Speaking of animations, I used an AnimationPlayer and AnimationTree (state machine) to make each "animation state" of the Noodlebonks -- resting, wiggle-up, and wiggle-down. You can read more about animation trees here: https://docs.godotengine.org/en/stable/tutorials/animation/animation_tree.html
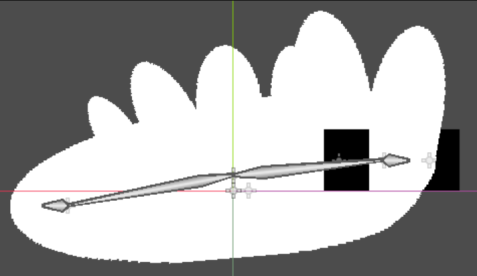
The above image is the rest animation state, and here are the wiggle-up and wiggle-down animation states:


...These look a little odd, but they will round out when displayed at a much lower resolution, and when we add the spines.
Here's the state machine that drives transitions between each animation state:
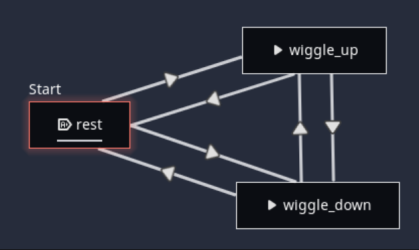
The key to making the animations smooth was setting Xfade Time on each arrow. I used 0.1 seconds for transitions going to wiggle states, and 0.2 seconds when going to the rest state
When the Noodlebonk jumps, it switches between each wiggle state and plays the respective animation. Also, when the Noodlebonk is "flat enough" on the ground, it goes into the rest animation.
...And that's it for the base!
The "Eye" Node
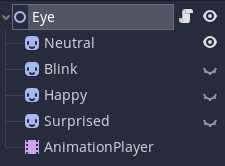
It's pretty simple. It's mostly driven by code, but it does use an AnimationPlayer to make each eye sprite visible at the right times. Here's the scene tree of an Eye:
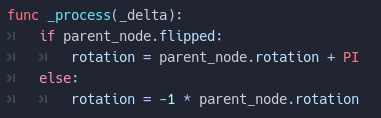
One important aspect of this Node is that it should always have a global rotation of zero. There are two ways to do this. One is to set global_rotation to zero with every frame. This isn't what I did because I allowed Noodlebonks to be flipped horizontally, so setting global rotation to zero doesn't work in this case (for some reason).
Instead, I apply an opposite local rotation to the parent Noodlebonk with every frame. If the parent is flipped, then I apply the opposite rotation (flipped is a variable I've defined myself):
Now, here's a code snippet that exposes functions to be used by a parent Node. It's pretty self-explanatory:

The "Eyes" Node (note the "s")
Let's move up to the parent script -- an "Eyes" Node -- so we can see when each animation is played:

Let's break this down.
The "Eyes" Node has two instances of "Eye" as its children. When it plays a blink, it tells each eye to try and play their blink animation at the same time. Likewise for "happy" and "surprised." This Node is listening for signals from the parent Noodlebonk: collide_with_barrier and jumped. When the Noodlebonk collides with a barrier, a third of the time, a "surprised" animation is played. Similarly, when a Noodlebonk jumps, an eighth of the time, a "happy" animation is played. Lastly, there's a timer that makes the eyes play a blink animation every time it times out, and it restarts with a new random time within a range.
...And that's it for how the eyes are animated!
The "Horn" Node
This one was really fun to make! I made a "Horn" Node that responds to the parent Noodlebonk's change in rotation by retaining its global_rotation while also wishing to return to its initial local rotation. I was inspired by some high-school physics to make this: Hooke's law
...I didn't actually use Hooke's law, since I didn't feel it necessary to use both velocity and acceleration, but the idea is similar. Essentially, as the horn rotates past its "baseline," the more it wants to rotate back.
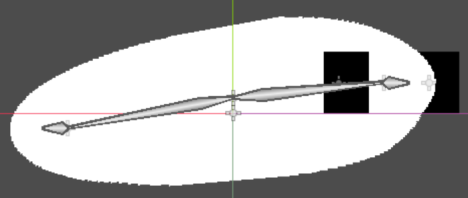
I started with a simple texture:

Then I exposed some variables that influence how it rotates, along with variant textures:
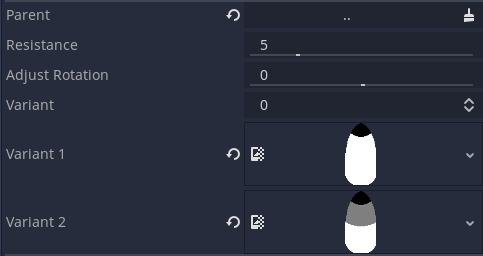
I added some internal variables for the animation, including a maximum on how much the horn should be able to deform its rotation:

Now, here's the physics process function that controls the animation:
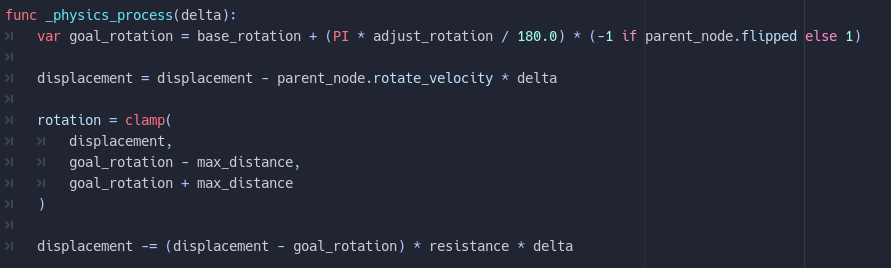
I'll explain what's going on here...
goal_rotation is where the horn wants to be. adjust_rotation is updated in the Noodlebonk's wiggle animations.
displacement is how far the rotation is from the baseline -- base_rotation -- in local rotation. It is updated with each physics frame, based on the rotational velocity of the parent. It rotates exactly opposite to the parent's rotation.
Next, the horn's (local) rotation is updated, clamped between the boundaries based on max_distance.
Finally, displacement is decreased based on resistance and how far it is from the goal rotation.
...And that's it for the Horn Node! The "antennae" on the Noodlebonk's head and the spines on its back are all instances of the Horn Node. The antennae are variant 0, and the spines are variant 2 (which is applied when the game starts).
Postprocessing shaders
This is where the magic happens! If you're new to shaders, don't let the name scare you. They're actually pretty simple!
(I recommend reading about it here: https://docs.godotengine.org/en/stable/tutorials/shaders/custom_postprocessing.h...)
Color replacement
This is a technique I created for another game I'm working on, but essentially, it revolves around making a shader that replaces "key colors" with different colors. It probably wasn't necessary for this small of a project, but it was something I'm familiar with.
For the main Viewport Node of the game, I added a shader that has six colors that I can define in the editor:
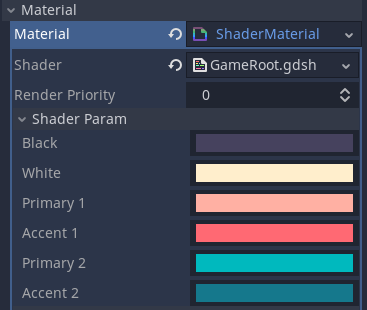
For each pixel in the Viewport, certain key colors are replaced with colors defined above. Every other color is left alone. Here's how it translates:
| KEY COLOR (R,G,B) | REPLACEMENT COLOR |
| (0, 0, 0) -- pure black | Black |
| (1, 1, 1) -- pure white | White |
| (1, 0, 0) -- pure red | Primary 1 |
| (0, 0, 1) -- pure blue | Primary 2 |
| (127.0 / 255.0, 0, 0) -- half red | Accent 1 |
| (0, 0, 127.0 / 255.0) -- half blue | Accent 2 |
The idea is that these key colors are really easy to test for. And this pattern can easily be extended. When I first developed this idea, I supported twelve different key colors instead of just six, so it just takes some decision-making and commitment to which key colors you want to use!
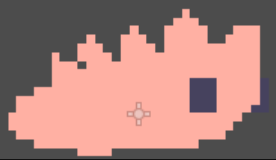
If I add a Noodlebonk to a scene (with a more low-res Viewport), this is what it looks like without any modification:

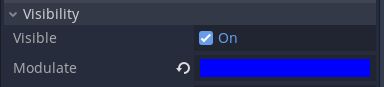
If I change its modulate property to #ff0000 -- solid red -- it applies Primary 1 to the body pixels:

Finally, if I change its modulate to #0000ff -- solid blue -- it applies Primary 2:

Outline shader
This one has a lot less going on than color replacement. Here's essentially what happens: for each pixel, if it is transparent and an adjacent one is not transparent, color it. This can be extended to include an outline thickness and color as variables that can be set in a workspace:

Anyways, here's the outline shader in its entirety:
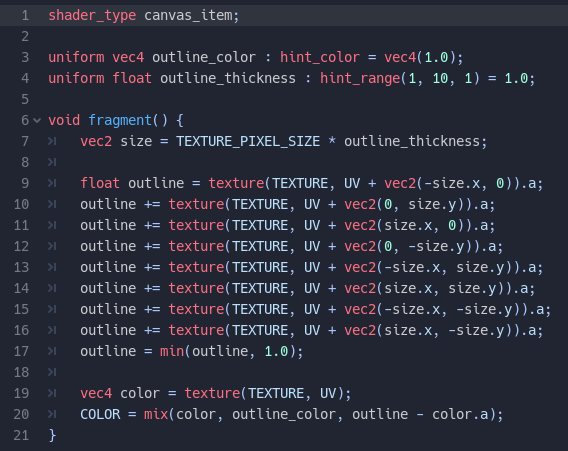
I'll explain what's going on line-by-line.
Lines 3 and 4 expose variables in the editor.
Line 6 identifies the fragment function, which essentially deals with the colors of a pixel. If you want to handle the location of a pixel, this is done in the vertex function, but I didn't have an application for it here. You can read more about 2D shaders here: https://docs.godotengine.org/en/stable/tutorials/shaders/your_first_shader/your_...
Line 7 defines how large the outline should be.
Lines 9 through 17 determine whether a pixel is a border pixel by adding the alpha values of all surrounding pixels. If they are 1 or greater, then it is adjacent to at least one non-transparent pixel. In short, outline is the alpha value of the current pixel after applying the shader.
Line 19 reads the color of the current pixel.
Line 20 sets the color of the current pixel, mixed depending on the current pixel's alpha value. i.e., if the alpha value is 1.0, there is no change. If it is 0 and outline is 1.0, it becomes the outline color. Rarely, if outline is 1.0 and the current alpha value is 0.5 (or some other fraction), it becomes a mix of the two. This is not encountered in my games, but it is there just in case.
Here's how a Noodlebonk looks with this additional shader:
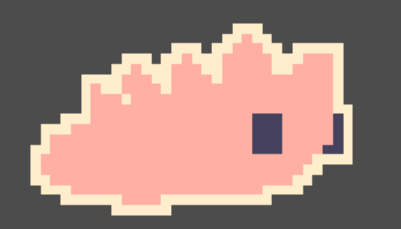
If we increase the outline thickness...

That's it!
I hope this has been helpful! Let me know if anything is vague or unclear. I tried to be as exhaustive as I could for this whole process. Anyways, good luck, and I hope this brings some nice spice to your own games! :D
Comments
Log in with itch.io to leave a comment.
Oh wow! This is so cute and insightful!
Thank you so much for taking the effort to write up such a concrete guide! I can't wait to try it!
But you also added shaders and pixel outlines! Thank you so much again aurora!